 Francesco Sun
Install Claude Code on your own server: the complete step-by-step guide
A server of your own, secured, with Claude Code installed on it and driven from your phone, then your domain name connected. This is everything I do when someone asks me to install it for them, written so you can do it yourself: 56 steps, in order, with the exact commands.
Updated October 7, 2026 · Ubuntu 24.04 · Claude Code 2.x · prices in € (OVHcloud) and $ (Claude)
Rather have me install it for you?I install it for €1 →
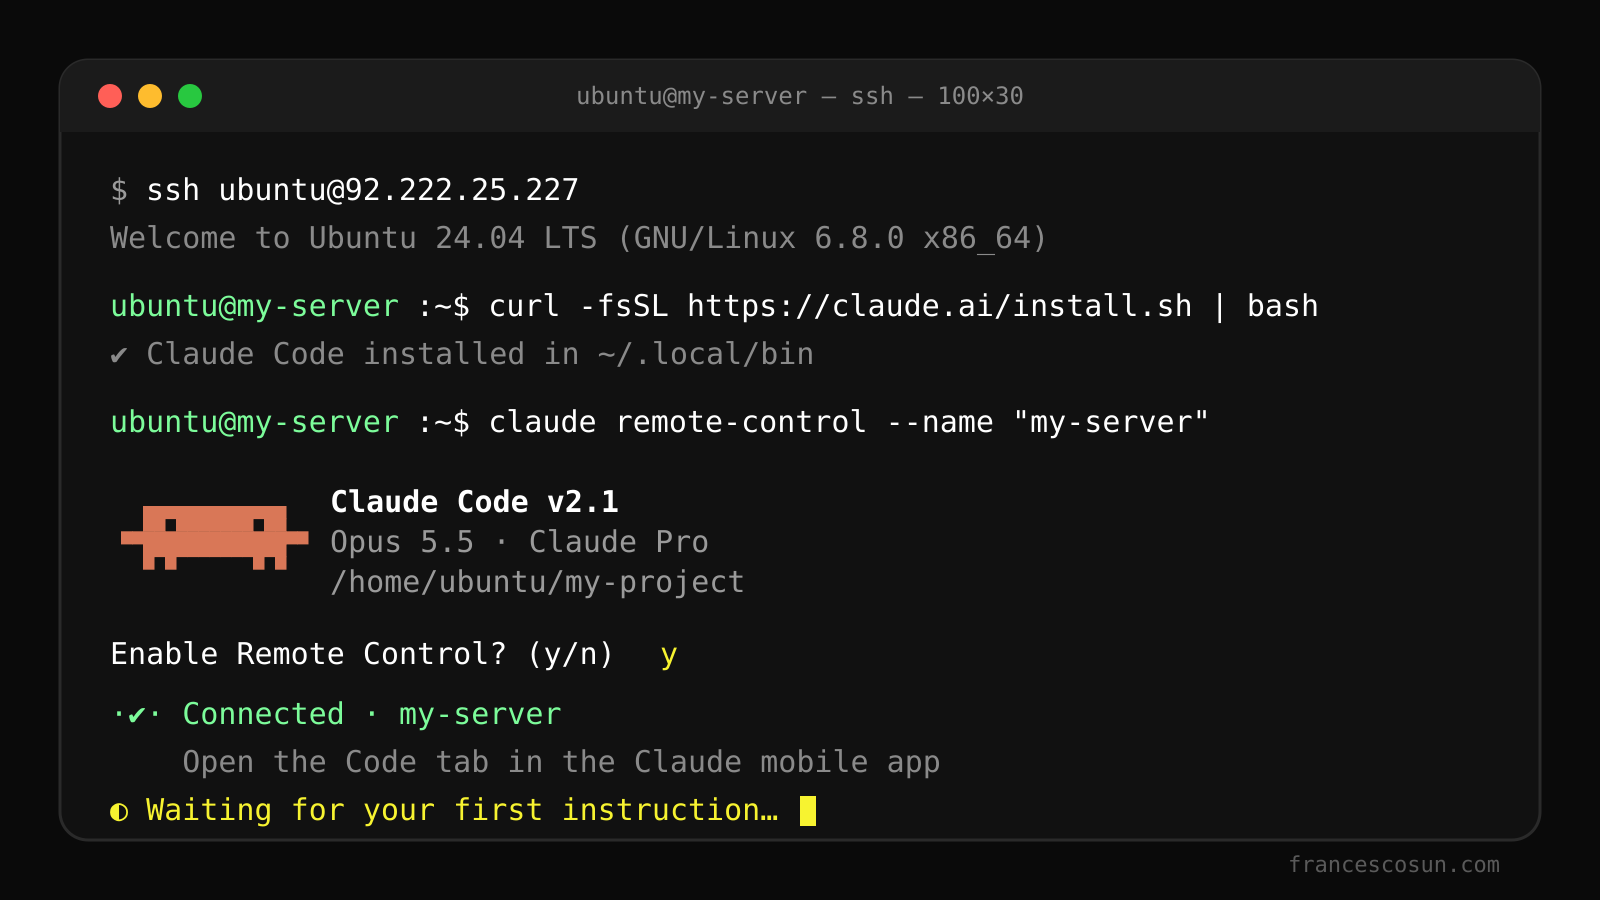
What is Claude Code?
Claude Code is the coding tool from Anthropic, the company behind the Claude AI. Unlike the Claude chat you may know, it works directly on the files of a computer or a server: it reads your project, writes and edits the code, runs the commands it needs and explains what it does. You talk to it in plain language; it handles the technical part. You can use it in a terminal, in the desktop app, or from the Claude app on your phone thanks to Remote Control.
Why install Claude Code on your own server rather than on your computer?
On your computer, Claude Code stops when you close it, and whatever it builds is only visible to you. On a server, it stays on day and night: you talk to it from your phone, wherever you are, and what it builds is immediately online, at your own address. Your computer stays clean, and everything you create belongs to you: no imposed website builder, no platform subscription.
How much does Claude Code cost?
The program installs for free, but you need a paid Claude account to use it: the Claude Pro plan (about $20 per month) is enough to start, Max (from about $100 per month) is for heavy use, and API credits are billed per use. Using it from your phone requires Pro or Max. Add the server: about €5.81 per month (roughly $7) at OVHcloud for the entry-level model, fine to get started, plus a domain name if you want one (about $15 a year for a .com).
- What is Claude Code?
- Why install Claude Code on your own server rather than on your computer?
- How much does Claude Code cost?
- Which host to pick, and how to create your account? (steps 1 to 6)
- Which VPS to order for Claude Code? (steps 7 to 14)
- How to connect to your server over SSH? (steps 15 to 20)
- How to secure your Ubuntu server? (steps 21 to 27)
- How to put a first page online over HTTPS? (steps 28 to 32)
- How to install Claude Code on Ubuntu? (steps 33 to 38)
- How to use Claude Code from your phone (Remote Control)? (steps 39 to 45)
- How to connect your domain name? (steps 46 to 52)
- How to look after your server? (steps 53 to 56)
- Frequently asked questions
Part 1 — Which host to pick, and how to create your account?
A server is rented from a hosting provider. This guide uses OVHcloud (cheap, European, what I use), but parts 3 to 9 work on any Ubuntu 24.04 VPS: Hetzner, DigitalOcean, Scaleway, Linode… Allow 10 minutes.
Open the OVHcloud website
Go to ovhcloud.com, click “My account” then “Create an account”. Pick “Individual” (or “Company” if you have a business registration number).
Fill in the form
Name, postal address, email, phone. Use your real address: the provider is required to verify it on a first purchase.
Confirm your email
You receive an email with a link: click it. Without this confirmation you cannot order anything.
Choose a strong password
At least 12 characters, with digits and symbols. Save it in your phone’s password manager: you will need it several times.
Turn on two-factor authentication
In My account → Security, enable verification by SMS or authenticator app. A server is a machine that belongs to you: lock the front door.
Add a payment method
In My account → Payment methods, register a card or PayPal. You can also pay at checkout, but a saved card makes the monthly renewal painless.
Part 2 — Which VPS to order for Claude Code?
A VPS is a small virtual computer, switched on day and night in a data center. For one or two websites, the smallest model is plenty.
Open the VPS page
In the OVHcloud menu: Bare Metal Cloud → VPS (or type “VPS” in the site search). You land on the list of models.
Pick the model
Take the VPS-1, the entry-level model (2 cores, 4 GB of memory, 40 GB of storage): about €5.81 per month (roughly $7) including VAT, daily backup included. You can upgrade later without reinstalling.
Pick the operating system: Ubuntu 24.04
Under “Image” or “Operating system”, choose Ubuntu 24.04. It is the system this guide follows, the most common and the best documented.
Pick the data center
Choose the one closest to your visitors (Canada, the UK, France, Germany, Singapore, Australia…). If one is “out of stock”, take another: it changes nothing for you.
Add automatic backups
The “Automated backup” option (around €0.35 per month) keeps a copy of your server every night. Take it: it is your safety net.
Confirm the order and pay
Duration “1 month” (no commitment), then “Order”. Pay with your card. On a very first purchase, the provider sometimes verifies your identity: check your email and send the requested document.
Wait for the delivery email
Between a few minutes and an hour. The email “Your VPS is ready” contains the IP address of your server (four numbers separated by dots, for example 92.222.25.227) and the password of the ubuntu user. Keep it safe.
Note the temporary technical address
Even before you have a domain, your server will answer at an address like https://92-222-25-227.sslip.io (your IP with dashes). Write it down: it is how you will check that everything works.
Part 3 — How to connect to your server over SSH?
You drive a server by typing commands in a “terminal”. Nothing scary: copy, paste, press Enter.
Open a terminal
On Mac: the Terminal app (Applications → Utilities). On Windows: Windows Terminal or PowerShell. On iPhone / iPad: an app like Termius or Blink Shell.
Connect with ssh
Type (replacing the IP with yours):
ssh ubuntu@92.222.25.227At the question “Are you sure you want to continue connecting?”, answer
yes. Then paste the password from the email: nothing shows while you type, that is normal.Change the password
Right after the first login:
passwdEnter the old one, then the new one twice. A password that was sent by email must never stay in service.
Create an SSH key on your computer
A key replaces the password with a secret file, far safer. On your computer (not on the server):
ssh-keygen -t ed25519Press Enter at the questions (or set a passphrase). Two files are created in the
.ssh folder.Send the key to the server
Still from your computer, on Mac or Linux:
ssh-copy-id ubuntu@92.222.25.227On Windows (PowerShell), where that command does not exist:
type $env:USERPROFILE\.ssh\id_ed25519.pub | ssh ubuntu@92.222.25.227 "mkdir -p ~/.ssh && cat >> ~/.ssh/authorized_keys"Enter the password one last time. From now on,
ssh ubuntu@92.222.25.227 logs you in without asking anything.Check that the key works
Open a second terminal and connect: if no password is requested, you are good. Do not close the first terminal before checking: it is your emergency door.
Part 4 — How to secure your Ubuntu server?
A brand-new server is visible to the whole world. Five settings close the useless doors and keep it updated on its own. All commands are typed on the server.
Update the system
sudo apt update && sudo apt -y upgrade
sudo means “as administrator”. This can take two or three minutes.Enable automatic updates
sudo apt -y install unattended-upgrades
printf 'APT::Periodic::Update-Package-Lists "1";\nAPT::Periodic::Unattended-Upgrade "1";\n' | sudo tee /etc/apt/apt.conf.d/20auto-upgrades
Security fixes will now install themselves every night.
Install the firewall and open only three doors
sudo apt -y install ufw
sudo ufw allow OpenSSH
sudo ufw allow 80/tcp
sudo ufw allow 443/tcp
sudo ufw --force enable
Port 22 to log in, 80 and 443 for the website. Everything else is closed.
Install fail2ban against login attempts
sudo apt -y install fail2ban
sudo systemctl enable --now fail2ban
A bot that tries passwords in a loop gets banned automatically.
Disable password login
Since your key works (part 3), switch off the old method:
echo "PasswordAuthentication no" | sudo tee /etc/ssh/sshd_config.d/60-security.conf
sudo systemctl reload ssh
Check in a second terminal that key login still works.
Install the tools the next parts need
sudo apt -y install curl git tmux ca-certificates
curl downloads, git keeps versions of your files, tmux keeps a program alive when you close the terminal.Reboot once
sudo rebootWait thirty seconds and reconnect. If it works, your server is clean and secured.
Part 5 — How to put a first page online over HTTPS?
A web server shows your files to visitors. Caddy is the simplest: it obtains and renews the HTTPS certificate (the padlock) by itself.
Install Caddy
sudo apt -y install debian-keyring debian-archive-keyring apt-transport-https gnupg
curl -1sLf 'https://dl.cloudsmith.io/public/caddy/stable/gpg.key' | sudo gpg --dearmor -o /usr/share/keyrings/caddy-stable-archive-keyring.gpg
curl -1sLf 'https://dl.cloudsmith.io/public/caddy/stable/debian.deb.txt' | sudo tee /etc/apt/sources.list.d/caddy-stable.list
sudo apt update && sudo apt -y install caddy
Create your project folder
mkdir -p ~/my-project
chmod 755 ~ ~/my-project
This is where your website files will live, and where Claude Code will work.
Write a first page
cat > ~/my-project/index.html <<'EOF'
<!DOCTYPE html><html lang="en"><head><meta charset="utf-8"><title>My project</title></head>
<body><h1>My server is online</h1></body></html>
EOF
Tell Caddy what to serve
Replace the address with yours (your IP with dashes, followed by .sslip.io):
sudo tee /etc/caddy/Caddyfile > /dev/null <<'EOF'
92-222-25-227.sslip.io {
	root * /home/ubuntu/my-project
	encode zstd gzip
	file_server
}
EOF
sudo systemctl enable caddy
sudo systemctl reload caddyCheck in your browser
Open https://92-222-25-227.sslip.io (with your IP). You should see “My server is online” with the padlock. If the page takes a minute to answer the first time, Caddy is obtaining the certificate: that is normal.
Part 6 — How to install Claude Code on Ubuntu?
Claude Code is Anthropic’s tool that reads and writes the files on your server when you talk to it. You need a Claude subscription (the Pro plan, about $20 per month, is enough to start).
Run the official installer
On the server, as the ubuntu user (not with sudo):
curl -fsSL https://claude.ai/install.sh | bashThe installer puts the program in
~/.local/bin.Make the command available
echo 'export PATH="$HOME/.local/bin:$PATH"' >> ~/.bashrc
source ~/.bashrc
claude --version
A version number shows up: Claude Code is installed.
Connect your Claude subscription
In your project folder:
cd ~/my-project
claude auth login
Claude prints a link: open it on your phone or computer, log in to your Claude account and click “Authorize”. A page then gives you a code.
Paste the code into the terminal
Back in the terminal, it is waiting with “Paste code here”. Paste the code, press Enter. Check:
claude auth statusThe answer must contain
"loggedIn": true.Mark the folder as trusted
On first launch, Claude asks whether you trust this folder. Launch it once:
claudeAnswer yes, then leave with
/exit. It is done once and for all.Make a first test
claude -p "Describe the files in this folder"Claude reads your folder and answers. You just had it work on your own server.
Part 7 — How to use Claude Code from your phone (Remote Control)?
Claude Code’s “Remote Control” keeps a session running on the server; you drive it from the Claude app on your phone, like a conversation.
Start a session that survives closing the terminal
With tmux, a program keeps running after you leave:
tmux new -s claude
cd ~/my-project
claude remote-control --name "my-server"
Answer “y” to the question
The first time, Claude asks “Enable Remote Control? (y/n)”: type y then Enter. The screen shows “Connected · my-server”.
Detach the session
Press Ctrl + B, then D. The terminal comes back, but the Claude session keeps running in the background. (To return to it later: tmux attach -t claude.)
Open the Claude app on your phone
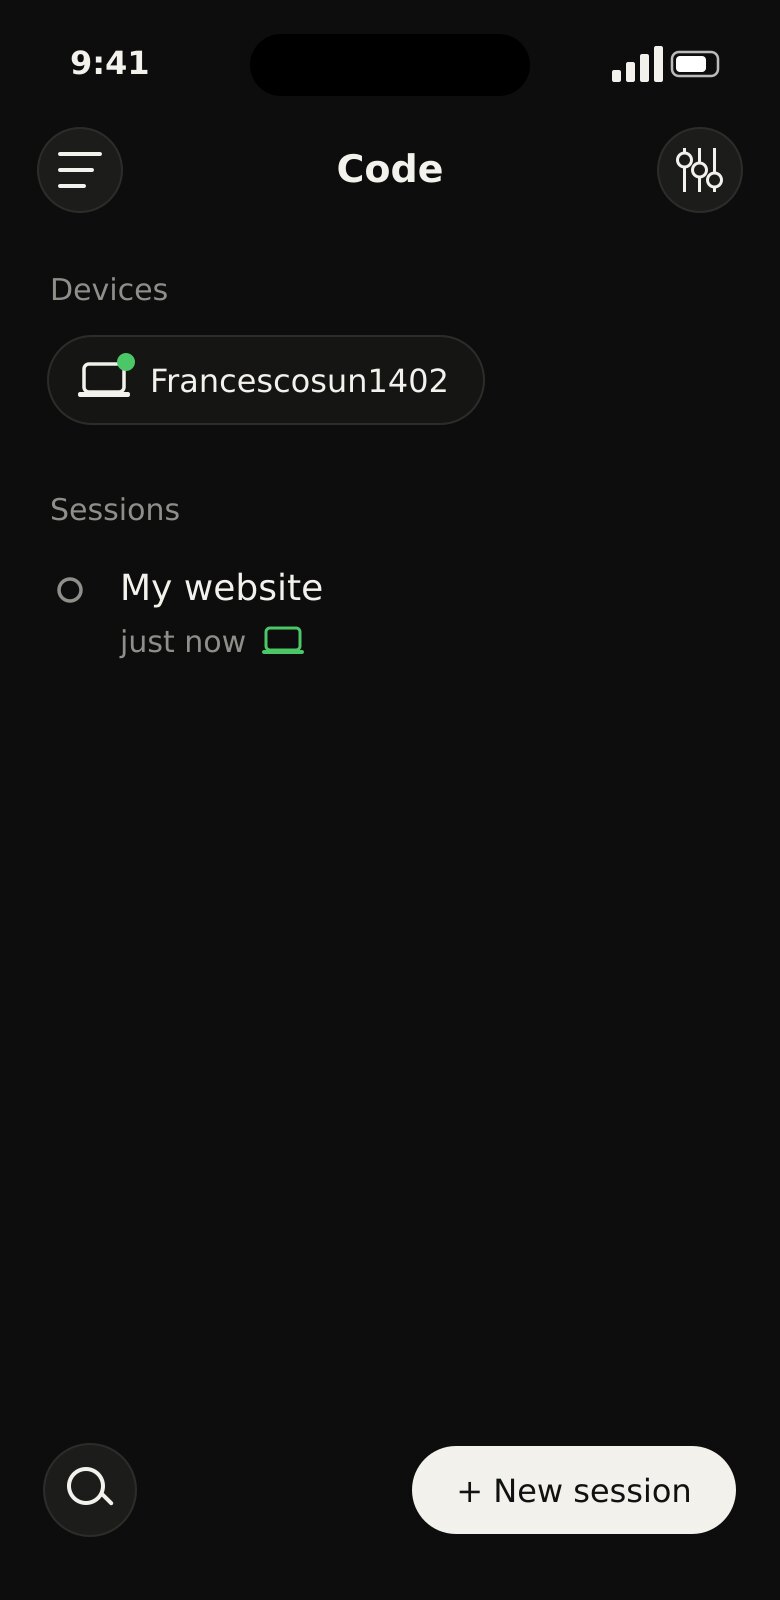
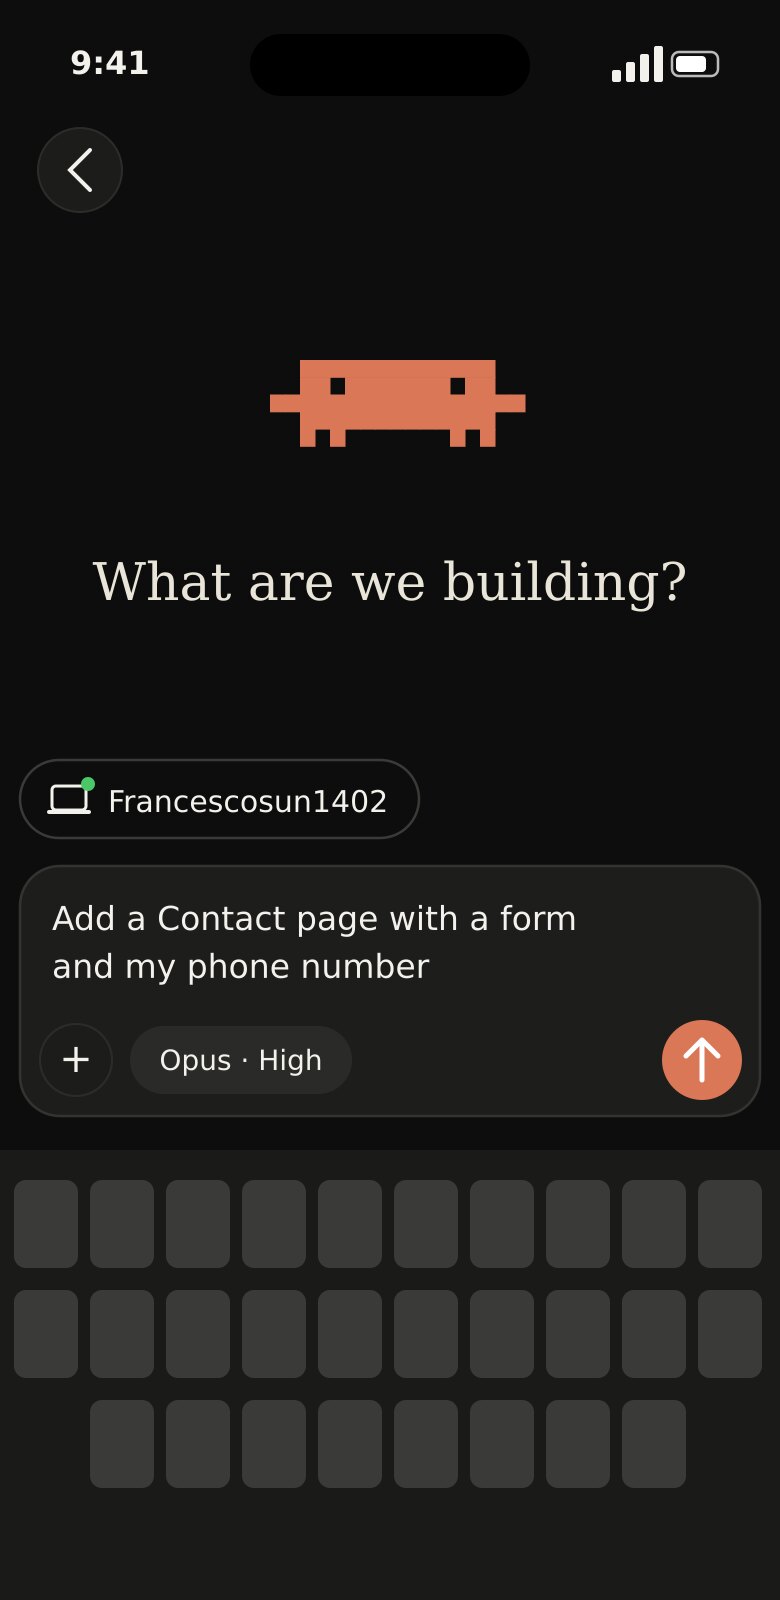
Code tab: your server “my-server” appears in the list of devices. Tap it, then “New session”.
Give a first instruction
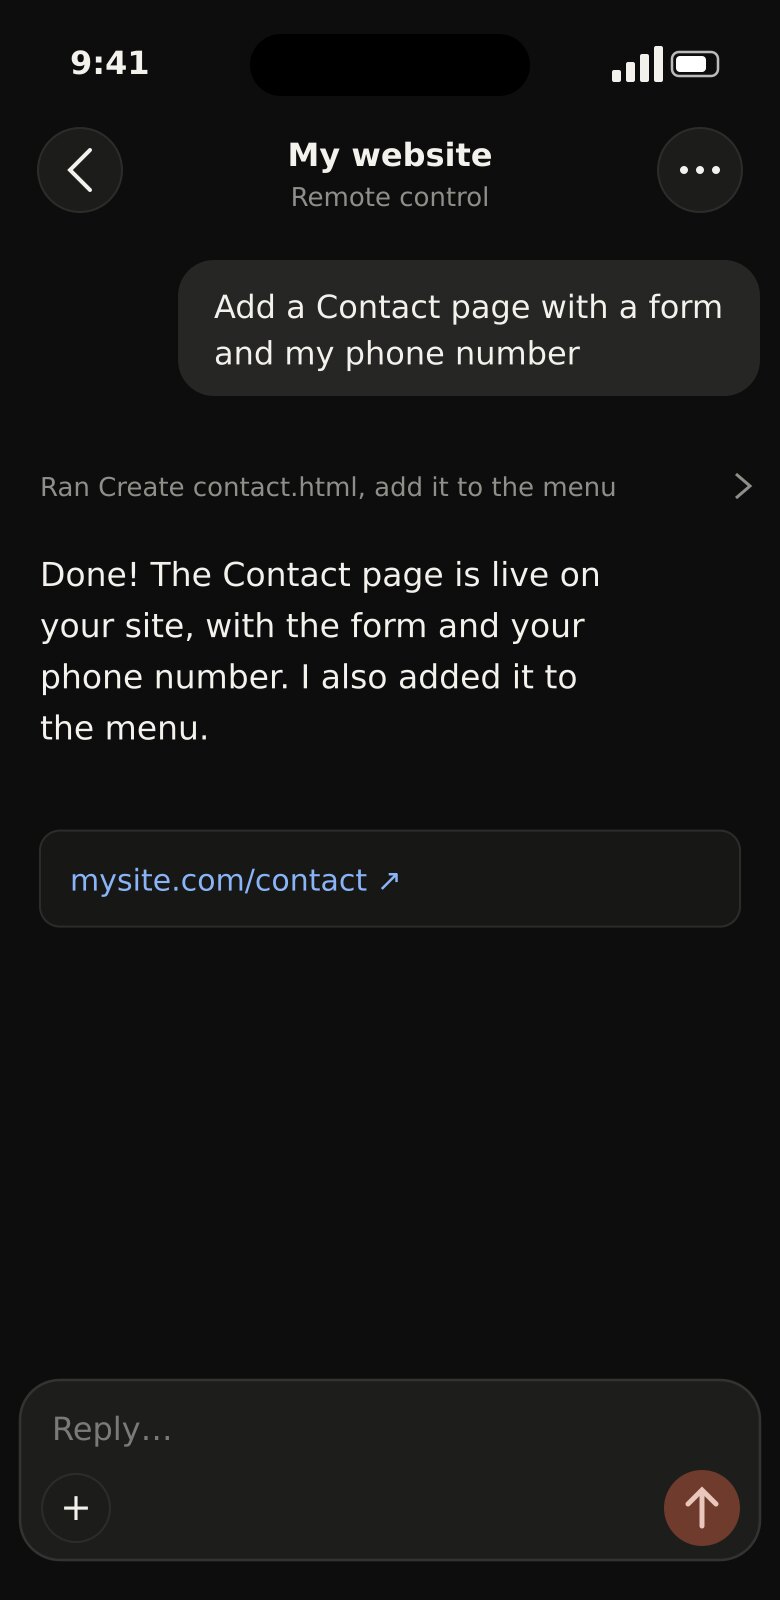
For example: “Change the home page title to ‘Welcome to my place’”. Claude edits index.html; reload your page in the browser: the title changed. You are coding from your phone.
Make the session restart by itself (optional, more technical)
A systemd service relaunches Remote Control when the server boots:
sudo tee /etc/systemd/system/claude-remote.service > /dev/null <<'EOF'
[Unit]
Description=Claude Code Remote Control
After=network-online.target
[Service]
User=ubuntu
WorkingDirectory=/home/ubuntu/my-project
Environment=PATH=/home/ubuntu/.local/bin:/usr/local/bin:/usr/bin:/bin
ExecStart=/home/ubuntu/.local/bin/claude remote-control --name "my-server" --permission-mode acceptEdits
Restart=always
RestartSec=10
[Install]
WantedBy=multi-user.target
EOF
sudo systemctl daemon-reload
sudo systemctl enable --now claude-remote
Pitfall to know: a service cannot answer “y” to the question of the previous step. If the service stops in a loop, add
"remoteEnabled": true to the file ~/.claude.json, then sudo systemctl restart claude-remote.Stop the tmux session if you use the service
Both must not run at the same time: tmux kill-session -t claude.
Part 8 — How to connect your domain name?
So far your site has a technical address. For it to answer at mysite.com, you tell your domain where the server is, then tell the server which domain it carries.
Open your domain’s DNS zone
At your registrar (OVHcloud: Domain names → your domain → DNS zone; otherwise wherever you bought the domain).
Edit the A record of the domain
Find the line of type A whose subdomain is empty (the domain itself). Set its target to your server’s IP. If there is none, add it: type A, empty subdomain, target 92.222.25.227, TTL 300.
Do the same for “www”
Type A, subdomain www, target: the same IP. Delete any CNAME “www” that pointed elsewhere.
Touch nothing else
The MX, SPF, DKIM and TXT lines are about your email: leave them alone. You only change the address of the website.
Add the domain to Caddy
On the server, edit the Caddyfile so it also serves your domain (replace with yours):
sudo tee /etc/caddy/Caddyfile > /dev/null <<'EOF'
92-222-25-227.sslip.io, mysite.com, www.mysite.com {
	root * /home/ubuntu/my-project
	encode zstd gzip
	file_server
}
EOF
sudo systemctl reload caddyWait for propagation
Between one minute and one hour, sometimes more if the old address had a long time-to-live. Check with a service like dnschecker.org: when your IP shows everywhere, it has propagated.
Open your domain over HTTPS
https://mysite.com must show your page with the padlock. Caddy requested the certificate by itself as soon as the domain pointed to it. If you still see the old site, clear your browser cache or try a private window.
Part 9 — How to look after your server?
Congratulations: you own a server, driven by Claude from your pocket. A few habits for the road.
Updates
They are automatic (part 4). Once a month, log in and type sudo apt update && sudo apt -y upgrade && sudo reboot for the updates that need a restart.
Backups
Your provider backs up the server every night (option from part 2). To restore: your VPS page → Backups. Also keep your files in a git repository (cd ~/my-project && git init); Claude knows how to use it.
When something breaks
The right reflex: describe what you see to Claude, or to the AI you usually use, in your own words. It will walk you through. If the server does not answer at all, reboot it from your provider’s control panel.
What it costs, and how to stop
About €5.81 (roughly $7) per month for the server, about $20 for the Claude subscription, plus your domain (about $15 a year for a .com). No commitment: the server is cancelled from your provider’s control panel, the subscription from your Claude account.
Install Claude Code yourself, or get help?
If the steps above look doable, go for it: you will learn a lot about how a server works. If you mostly want the result, I automated exactly these 56 steps: you link your OVHcloud account in one click, pick your server, and everything installs itself in about fifteen minutes, for €1 (about $1). Nothing stops you from reading this guide to understand it, then letting me do it.
The result: your server in the Claude app
Once the installation is done, this is what you see on your phone.
Don’t feel like doing all this?
I install it for you for €1 (about $1): you link your OVHcloud account in one click (your password never goes through me), pick your server, and the 56 steps above run on their own in about fifteen minutes. The service page is in French for now, but the installer works with any OVHcloud account and any data center.
See the $1 installation (page in French) →Frequently asked questions
Is Claude Code free?
The Claude Code program installs for free, but you need a paid Claude account to use it: a Claude Pro subscription (about $20 per month) or Max, or API credits billed per use. Remote Control (driving it from your phone) requires a Pro or Max subscription. The server itself costs about €5.81 per month (roughly $7).
How do I install Claude Code on Ubuntu?
On Ubuntu 24.04 a single command does it, as a normal user: curl -fsSL https://claude.ai/install.sh | bash, then add ~/.local/bin to your PATH and connect your account with claude auth login. Steps 33 to 38 of this guide show the details.
What is Claude Code Remote Control?
It is the mode of Claude Code that keeps a session running on your server while you drive it from the Claude app on your phone or from claude.ai. You start it with claude remote-control; steps 39 to 45 explain how to keep it running permanently.
Do I need to know how to code?
No, but you must be willing to copy and paste commands into a terminal and follow the steps in order. Once installed, you talk to Claude in plain language and it writes the code.
How long does it take?
One to two hours the first time, a good part of it waiting (server delivery, domain propagation). Done on a computer with the commands at hand, the core (parts 3 to 7) takes about 20 minutes.
Can I do this on another host than OVHcloud?
Yes: parts 3 to 9 work on any Ubuntu 24.04 VPS (Hetzner, DigitalOcean, Scaleway, Linode, Vultr…). Only parts 1 and 2 are specific to OVHcloud.
What if I make a mistake somewhere?
A fresh server can be reinstalled in two clicks from your provider’s control panel (“Reinstall”), and you start again from part 3. Nothing is irreversible until you put important data on it.